Lifestyle
Spook the kids with creepy Halloween fingers
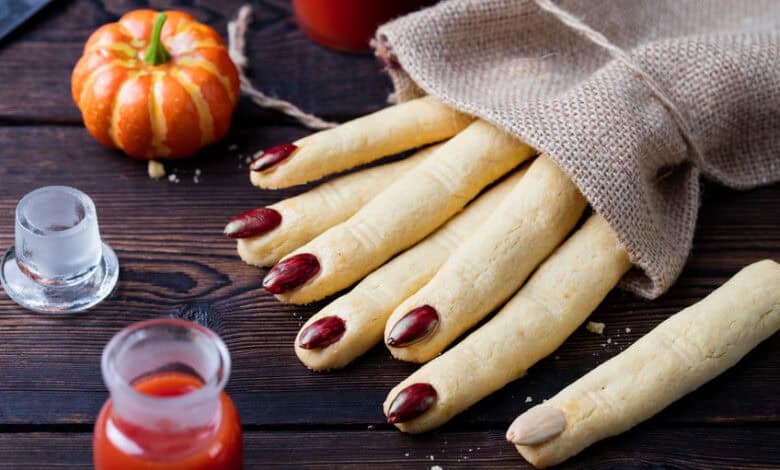
With buttery, crumbly dough and just the right amount of crunch, these Halloween fingers are as tasty as they are terrifying.
Tomorrow is Halloween, so what better way to step up your spooky game than with Halloween finger cookies?
These little treats are a wonderfully gruesome twist on classic shortbread, shaped like terrifyingly realistic severed fingers that will have your kids doing a double-take. With buttery, crumbly dough and just the right amount of crunch, they’re as tasty as they are terrifying.
Ingredients
- 1 cup unsalted butter, softened
- 1 cup powdered sugar
- 1 large egg
- 1 teaspoon vanilla extract
- 1 teaspoon almond extract (optional but adds great flavor)
- 2 ¾ cups all-purpose flour
- 1 teaspoon baking powder
- ¼ teaspoon salt
- Red food colouring
- Almonds (whole, sliced, or slivered for nails)
- Green, red, or black gel icing (for added decoration)
Method
- Cream the softened butter and powdered sugar in a large bowl.
- Add the egg, vanilla extract, and almond extract. Stir until well combined.
- In a separate bowl, whisk together the flour, baking powder, and salt. Gradually add this dry mixture to the butter and sugar mix. Stir until the dough comes together, but don’t overmix.
- Now for the fun part – turning that dough into horrifying fingers! Take about a tablespoon of dough and roll it into a finger-like shape. Don’t worry about making it too smooth—imperfections are perfect for a creepy, wrinkled finger look. After all, you want them to look like they’ve been freshly severed, right?
- Gently press the dough at intervals to create knuckle marks. Use a sharp knife to add a few tiny lines across the knuckles for added realism.
- To give your fingers their freaky finishing touch, press an almond (whole or slivered) onto the tip of each cookie to resemble a fingernail. You can even use green or black almonds for a wicked witchy vibe! Make sure the almond is slightly pressed into the dough so it won’t pop off during baking.
- Once your cookies are shaped and decorated, pop them in the fridge for about 30 minutes. This will help the dough hold its shape and prevent them from spreading too much in the oven.
- Preheat your oven to 175°C while the cookies chill. When you’re ready, line a baking sheet with parchment paper and carefully transfer your cookies. Bake for 12 to 15 minutes, or until the edges just start to turn golden.
- Once your cookies have cooled, it’s time to make them extra gory! To create a “bloody” effect, use red food colouring to paint around the base of the almond nails and the bottom of the fingers. You can use a small paintbrush or even a toothpick for precise application.
- For an extra touch, use black, red, or green gel icing to add veins or cracks along the fingers.